If you’re searching for the perfect easy dessert recipe that’s loaded with sweet and crunchy goodness, look no further than Caramel Chocolate Crunch Bars! These indulgent treats combine gooey caramel, rich chocolate, and a satisfying crunch, making them a hit for any occasion. Whether you’re preparing a dessert for a potluck, a family gathering, or simply treating yourself, these bars are simple to make and irresistibly delicious. Let’s dive into the step-by-step process of creating this mouthwatering dessert.
Ingredients:
To get started, you’ll need the following ingredients:
For the crust:
• 2 cups crushed graham crackers (about 14 full sheets)• ½ cup melted unsalted butter• ¼ cup granulated sugar
For the caramel layer:
• 1 cup granulated sugar
• ½ cup unsalted butter
• ½ cup heavy cream
• ¼ cup light corn syrup (optional, for extra smoothness)
• ¼ teaspoon salt
For the chocolate topping:
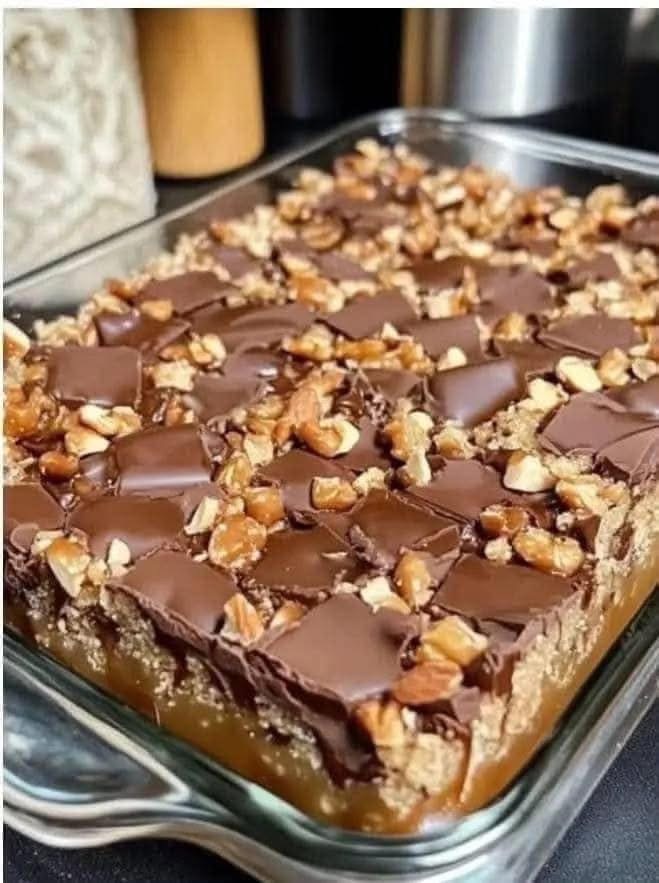
• 2 cups semi-sweet chocolate chips or chopped chocolate
• 1 tablespoon vegetable oil or coconut oil (for a glossy finish)
Optional add-ins:
• 1 cup chopped nuts (pecans, almonds, or walnuts)
• 1 cup crushed pretzels or rice cereal for added crunch
• Sea salt flakes for garnish
Step 1: Prepare the crust
• Preheat the oven: Set your oven to 350°F (175°C) and line a 9×13-inch baking pan with parchment paper, leaving some overhang for easy removal.
• Mix the crust: In a medium bowl, combine the crushed graham crackers, melted butter, and granulated sugar. Stir until the mixture resembles wet sand.
• Press into the pan: Pour the crust mixture into the prepared baking pan. Press it down firmly with the back of a spoon or a flat-bottomed glass to create an even layer.
• Bake the crust: Bake for 8–10 minutes, or until golden and set. Remove from the oven and allow it to cool while you prepare the caramel layer.
Step 2: Make the caramel
• Melt the sugar: In a heavy-bottomed saucepan over medium heat, add the granulated sugar. Stir constantly with a wooden spoon until the sugar melts and turns a deep amber color.
• Add the butter: Carefully add the butter to the melted sugar, stirring until fully incorporated. Be cautious — the mixture will bubble up!
• Incorporate the cream: Slowly pour in the heavy cream while continuing to stir. Again, the mixture will bubble up but will settle down as you stir.
• Finish the caramel: Add the corn syrup (if using) and salt, stirring until smooth. Let the caramel simmer for about 2–3 minutes until it thickens slightly. Remove from heat.
• Pour the caramel: Evenly pour the hot caramel over the cooled crust, spreading it out with a spatula.
Step 3: Create the chocolate layer
• Melt the chocolate: In a microwave-safe bowl, combine the chocolate chips and oil. Microwave in 30-second intervals, stirring after each interval, until smooth and fully melted. Alternatively, you can melt the chocolate over a double boiler.
• Add the crunch: If using chopped nuts, pretzels, or rice cereal, fold them into the melted chocolate for an extra crunch.
• Layer the chocolate: Pour the melted chocolate over the caramel layer, spreading it evenly with a spatula.
• Garnish: Sprinkle a pinch of sea salt flakes on top for a sweet and salty contrast.
Step 4: Chill and serve
• Chill: Place the pan in the refrigerator for at least 2 hours, or until the bars are completely set.
• Slice and enjoy: Once set, lift the bars out of the pan using the parchment paper overhang. Place them on a cutting board and slice into squares or bars. Wipe your knife with a warm cloth between cuts for cleaner edges.
Tips for the perfect crunch bars:
• Use high-quality chocolate: The better the chocolate, the richer the flavor!
• Experiment with add-ins: Don’t hesitate to mix in your favorite crunchy elements like toffee bits, cookie crumbles, or even crushed candy bars.
• Room temperature serving: Let the bars sit at room temperature for about 5 minutes before cutting to prevent cracking.
These Caramel Chocolate Crunch Bars are everything you could want in a dessert — sweet, crunchy, rich, and utterly satisfying. Best of all, they’re simple to make with ingredients you probably already have in your pantry. Try them out, and don’t be surprised if they become your new go-to dessert recipe!